Bridge saw, waterjet, CNC and sawjet: the machines of a US countertop shop
Here is every machine and tool a countertop shop runs, walked through roughly in the order the stone moves — from the slab yard and the field, through cutting and machining, to finishing and the install truck. Naming the exact machine, and knowing what it does, is most of sounding like you belong in the building. Click any machine to open it up.
Handling
Slab handling & lifting
In every shop, every yardCombilift · Toyota · Wood's Powr-Grip · Abaco · Aardwolf · Groves›
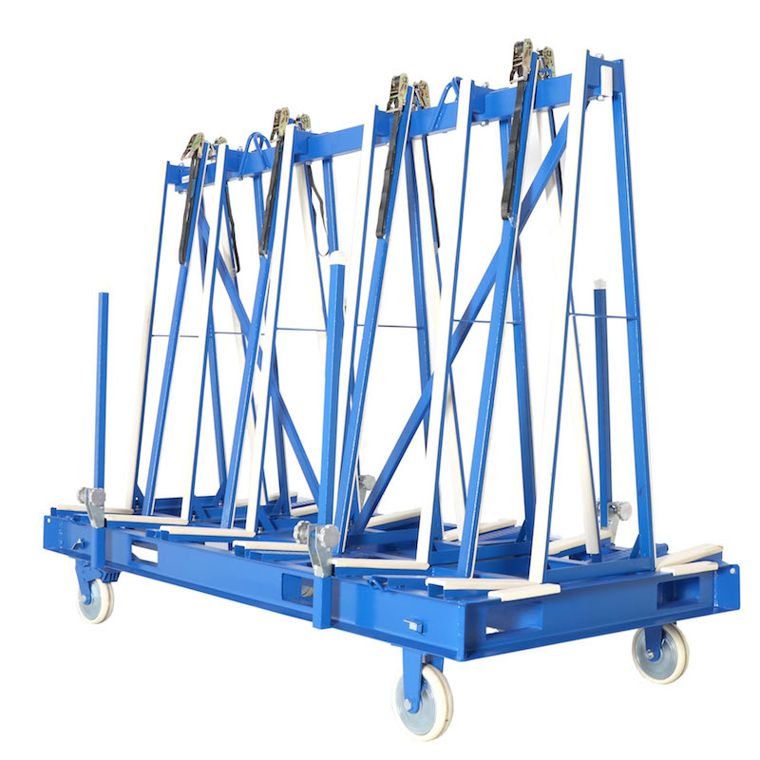
Slab handling is the muscle of the shop: the forklifts, cranes, vacuum lifters, clamps, and A-frame racks that move full stone slabs from the delivery truck to the yard, into the shop, and up onto the saw and CNC. A full 3cm granite or quartzite slab runs roughly 18 to 20 pounds a square foot, which puts most of them between 900 and 1,500 pounds — closer to half a ton than to anything one person moves and stands taller than the person moving it, so nearly everything a fabricator makes starts with getting that slab where it needs to be without cracking it or hurting anyone. It is the least glamorous corner of the trade and one of the most important to get right.
Its job
Move full slabs, truck to saw
How
Forklifts, cranes, vacuum lifters, clamps
Runs wet
No
In the flow
Upstream — before every cut
Where you start
Most helpers start here
How to move a granite slab (and why it stays on edge)
Slabs travel and live on their edge, almost never flat — and the first thing you learn is that stone is strong in compression and weak in bending, so you keep it standing and supported until the machine takes it.
A big slab laid flat and unsupported can crack under its own weight
They ride in on A-frame trailers and get stored on A-frame racks that lean the stone slightly back so gravity holds it
Bundles come off the truck strapped to their shipping A-frame; a forklift or side-loader pulls the whole rack off, or lifts slabs down one at a time
The lifting gear
Forklifts do the heavy yard and truck work; side-loaders (Combilift style, forks off the side) carry a wide bundle down a narrow aisle without swinging it around
Standard counterbalance forklifts (Toyota) show up too, usually fitted with a boom or a slab rack attachment
Overhead gantry and jib cranes lift slabs off storage onto the bridge saw, running on a trolley so one person can walk a slab across the shop
Hanging off the crane are the gripping tools: vacuum lifters and mechanical clamps
Vacuum vs clamp
Vacuum lifter (Wood's Powr-Grip) uses a powered pump and rubber pads to grab the polished face without gripping the edges — fast and clean, but it lives and dies on a good seal, a charged battery, and a working gauge, so you check those before every lift and listen for the slip alarm
Mechanical clamps and grabs (Abaco, Aardwolf, Groves) are a scissor-style jaw that bites harder the more weight hangs from it; they need no vacuum or battery and tolerate a rough or dusty surface, which makes them the reliable backup and the go-to for rougher stock
Those same brands make the A-frames, dollies, and carts the whole system rides on
Who runs it — and how you move up
This is where almost every helper starts, and there's a real skill ladder hiding in work that looks like grunt labor. Handle stone well for a year and you understand the material's limits better than someone who jumped straight to a machine — which is exactly why shops promote off this station into sawing, fabricating, and install.
Day one: spot a slab that isn't seated right, keep your hands and feet out of the pinch line, and never stand where a slab would fall
Next: sling and balance a slab so it hangs level on the crane, and read a vacuum gauge and trust it
Then: walk a big piece through a tight shop without clipping a corner
Eventually: run the forklift and load a truck so the delivery crew can strap and go
Good to know
Slabs are strong standing up and weak lying down: keep them on edge and supported, because an unsupported slab laid flat can crack under its own weight.
A vacuum lifter grabs the polished face with no marks but depends on a good seal, a charged battery, and a live gauge; a mechanical clamp needs no power and grips harder the more it lifts, which is why clamps are the reliable backup.
Side-loader forklifts (Combilift style) exist because a slab bundle is wide and awkward, and carrying it sideways down a narrow aisle beats swinging a standard forklift around.
Never stand in the fall path or the pinch line of a slab, and never put a hand where the stone would trap it against a rack or a machine.
This is the station most helpers start on, and handling stone well teaches you the material's limits better than jumping straight onto a machine does.
Makes & models you'll hear
Combiliftside-loaders
Toyotaforklifts
Wood's Powr-Gripvacuum lifters
Abaco
Aardwolf
Grovesclamps & A-frames
A forklift and overhead crane moving a slab on an A-frame, vacuum lifter on the face
Field
Digital templating device
Common in modern shopsProdim · Laser Products Industries›
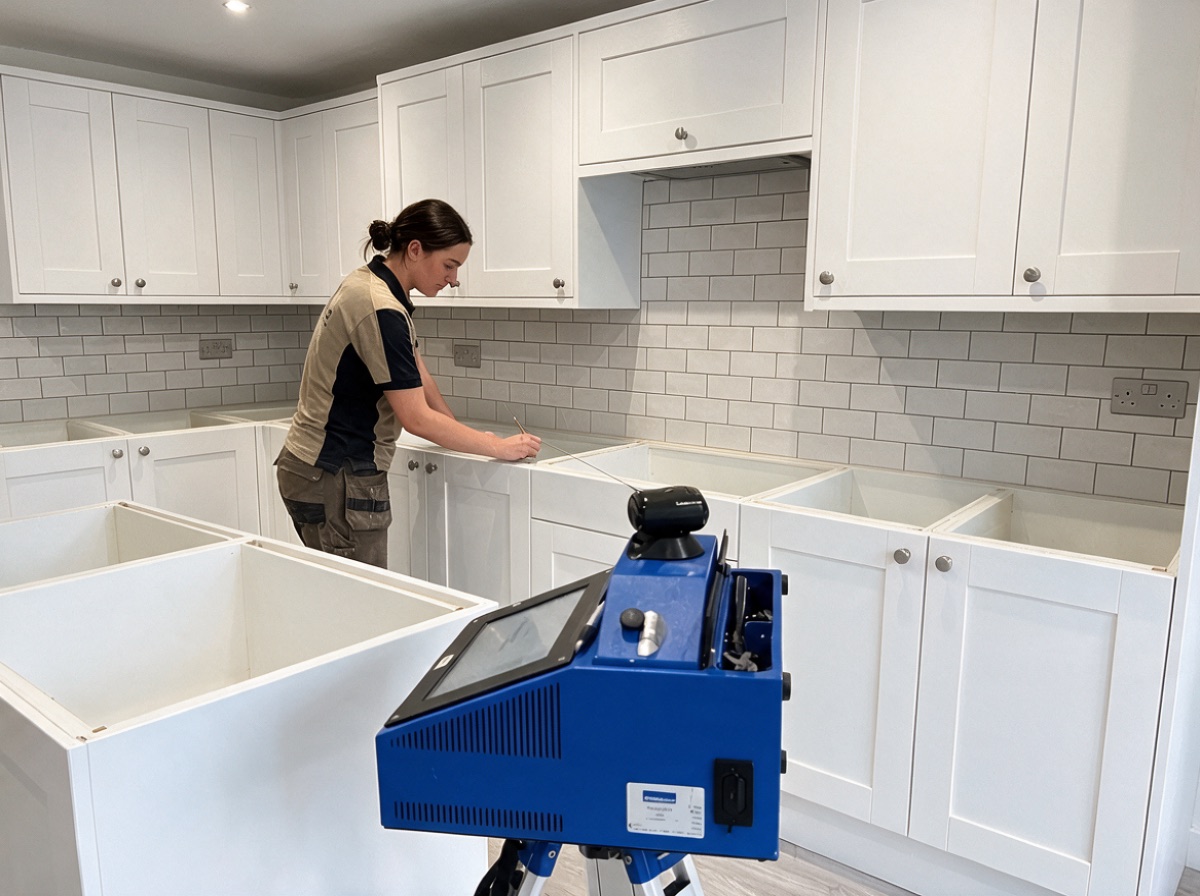
Countertop templating today is digital templating: a templater carries a field device onto the job after the cabinets are in and captures a kitchen's exact geometry into a digital file the shop can fabricate from. It replaces the old physical template made from luan or plastic strips with a coordinate file that records the outline, wall angles, backsplash heights, and cutouts. Everything the saw and CNC do later starts from what this tool captures.
Its job
Capture a kitchen's exact geometry into a digital file
How
Laser or stylus records 3D coordinates on site
Runs wet
No
In the flow
Field device, after cabinets are set
Run by
The templater
How it works
The templater carries it into the kitchen once the cabinets are set and leveled, and captures the exact shape of every countertop surface as a digital file. It replaces the old physical pattern with a coordinate file that lands on the programmer's screen the same day.
The old way: strips of luan, hardboard, or corrugated plastic cut to fit and hot-glued into a full-size skeleton, then hauled back to trace onto the slab
That pattern could rack out of shape in the truck, ate an hour of gluing per job, and only captured what you thought to build
The digital file carries the outline plus wall angles, backsplash heights, appliance openings, and how far out of level the cabinets sit
Laser vs stylus
There are two dominant approaches, and most shops commit to one.
Laser (Laser Products Industries LT-2D3D, or the older LT-55): a tripod unit aims a laser at each point, using reflective targets where needed, and stitches them into the template; the 2D3D name is its trick of capturing both the flat top and the vertical world around it
Stylus digitizer (Prodim Proliner): you touch a tethered pen to each point corner by corner, and the unit records the 3D coordinate of every touch
Laser is fast in open, line-of-sight rooms; the stylus shines where you must reach into tight spots, around a finished island, or trace an odd radius the laser can't see cleanly
In the shop flow
On site the operator translates a real, imperfect room into a clean file the shop can trust.
Capture the perimeter, mark the sink and faucet holes, note the cooktop cutout, set the overhang past the cabinet face, and flag anything the drawings missed
The file exports to programming and nesting, where a programmer lays the pieces on the actual slab to fit the veining and place the seams, then sends the cuts to the bridge saw and CNC router
The templater decides, right there in the kitchen, where a seam falls, whether one piece can make the turn, and how a 2cm or 3cm top changes edge buildup and overhang
Hand off a bad file and you've fed a scrap-making machine: a slab cut to a wrong template can't be un-cut
Who runs it and how you move up
Shop veterans say the device takes about a week to operate and the room takes years to read.
The button-pushing is quick to learn: any careful person can pull usable templates within days
Walls are never truly square and floors never truly flat, so you learn to feel where a top will bind, where a corner needs relief, and how much reveal to leave around an undermount sink
You learn where a seam will disappear versus where it will glare under a window, and which measurements the software forgives versus which ones end a job
The device is only as good as the person reading the space, which is why templating stays a skilled hands-on role even as the file goes fully digital
Good to know
Templating happens only after cabinets are set and level, with the sink, faucet, and cooktop either on site or firmly spec'd — measure too early and everything downstream shifts.
A bad template is the most expensive mistake in the shop: a slab cut to a wrong file is scrap that can't be un-cut.
The laser approach (Laser Products) needs clear line of sight and reflective targets; the Proliner stylus needs you to physically reach and touch every point, which wins in tight or blocked spots.
The file the templater sends drives the whole workflow — the programmer nests it on the slab, but the templater is the one who decides where the seams fall.
Walls lean and corners run off square in most real kitchens; the device captures the true angles so the finished top actually drops into place.
Makes & models you'll hear
ProdimProliner (stylus)
Laser Products IndustriesLT-2D3D · LT-55 (laser)
A skill worth owning. Templating has gone almost fully digital, but the device takes about a week to learn while reading a real room takes years. Get fluent on both and you're hard for a shop to replace.
Capturing every dimension in the room before a slab is touched, on a digital templating device
Programming
Slab imaging & digital layout
Bigger and better-run shopsSlabsmith (Northwood Designs) · Park Industries›
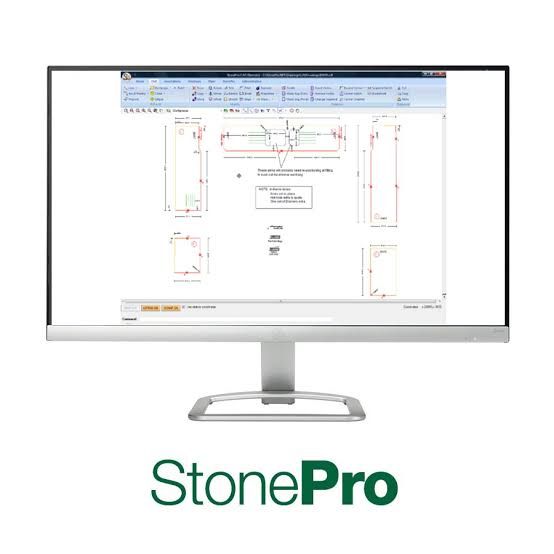
A camera-and-software station that photographs each real slab in high resolution, corrects the image so it's dimensionally accurate, and drops it into layout software. Instead of nesting your parts onto a blank rectangle, the programmer places every countertop piece directly on a calibrated image of the slab's actual veining. It's a planning tool, not a cutting machine — nothing gets cut here.
Its job
Photographs and lays out real slabs on screen
How
Calibrated slab photo in layout software
Cuts stone
No — a planning tool only
In the flow
Upstream planning, before the saw and CNC
Who runs it
Run by the programmer or layout tech
How it works
The workflow runs on screen, and the layout it produces drives the machines downstream:
A slab goes in front of the imaging station's camera; the software stitches and calibrates a flat, measured photo you can trust for dimensions, not just look
That image lives in a digital library, so a programmer can lay out a job against slabs still racked in the yard, or even at another location
On screen you drag part shapes onto the photo, rotate and nudge them to catch the best of the pattern, and line the vein up across a seam
You steer flaws or resin spots into a sink cutout or a drop where nobody will see them
Once it's dialed in, that layout drives the saw and CNC — pieces come off already vein-matched, and you cut once instead of guessing
The problem it solves
Natural stone and a lot of the wilder quartz patterns aren't uniform — the movement, veins and color run across the slab and change from one end to the other. When you build a kitchen out of several pieces, you want the vein to flow from the countertop up the backsplash and across a seam so the eye reads two pieces as one. The old way is to walk the slab, chalk your parts on by hand, and trust your eye — it works, but it's slow, it ties up floor space, and a mistake doesn't show up until the saw has already cut it. Slab imaging moves that whole conversation onto a screen.
The system to know
Slabsmith is one of the established digital slab-imaging and layout systems in US shops; we name it because the trade uses it as shorthand for this station, not as an endorsement. It was developed by Northwood Designs, so you'll often see it sold and supported alongside their saws and CNC routers
A full setup is usually a fixed imaging station with controlled lighting and a mounted camera, feeding a software seat at the programmer's desk
Some shops also use it as a live inventory system, tracking which slabs are on hand and how much usable area is left after a job
Treat any specific package or bundle names as things to confirm with the vendor rather than assume
Who runs it — and how you move up
Digital vein-matching makes repeatable matching easier and can cut remakes and wasted material compared with laying out by eye alone, and it helps a finished kitchen's seams and flow look designed rather than accidental. If you're a programmer or moving toward that seat, getting fluent on a system like this is a genuine skill step up. If you're an installer or fabricator, it's worth understanding — the layout decisions made on that screen are what you'll be seaming and setting on site.
Good to know
The imaging step is what lets a shop promise the customer that the vein will flow across the seam and up the backsplash — and actually deliver it.
The photo is calibrated to real dimensions, so it doubles as a measuring and yield tool, not just a pretty picture of the slab.
It shines on book-matched and heavily veined material, where two adjacent pieces are supposed to mirror each other — that's almost impossible to plan reliably by eye.
Slabsmith is sold and supported in the US alongside the Park Industries umbrella, which is why you'll often see it paired with their bridge saws and CNC routers in the same shop.
It's a programming and planning tool — it saves material and remakes, but it doesn't touch the stone, so a shop still needs the saw, router, and polishing behind it.
A slab at an imaging station, its layout shown on the programmer's screen
Cutting
Bridge saw
In nearly every shopPark Industries · GMM · Sasso · Denver · Achilli · Prussiani›
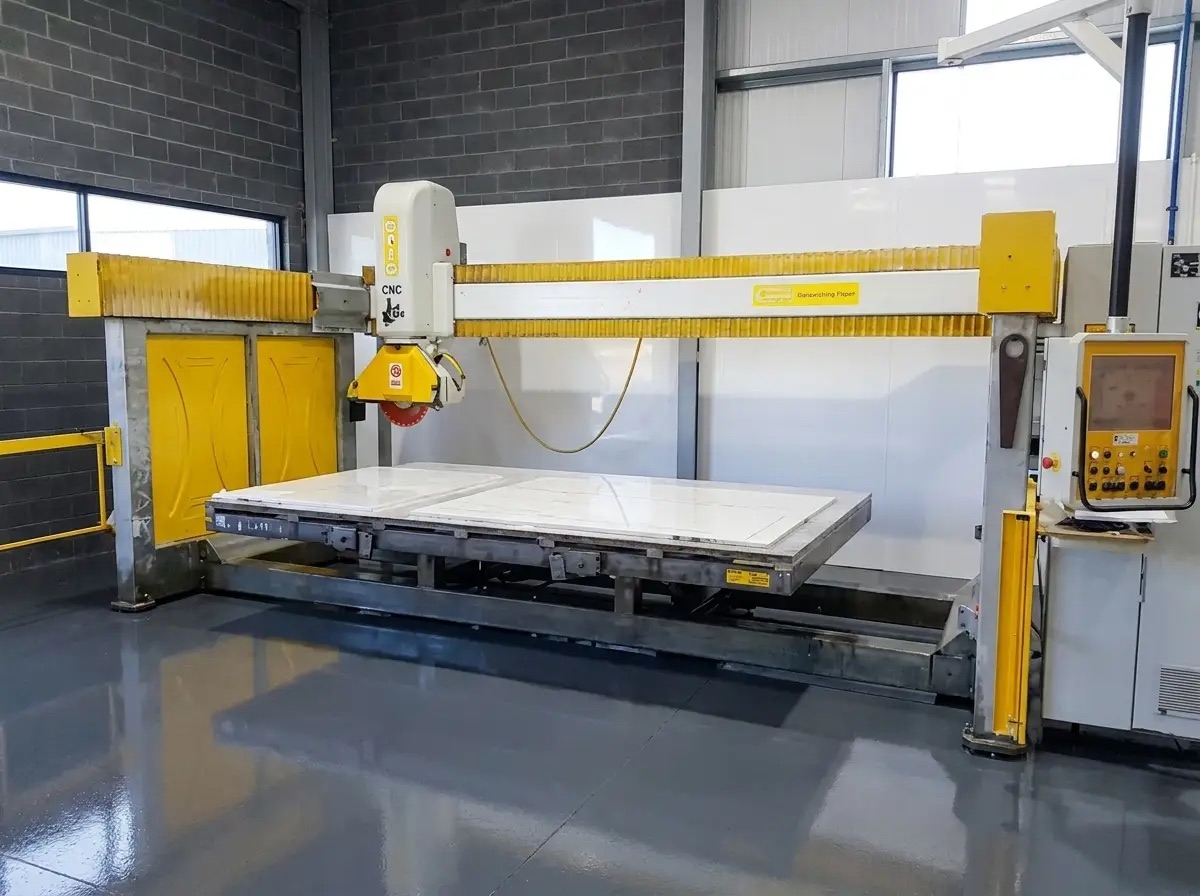
The bridge saw is the first real machine most slabs meet inside the shop. A large diamond blade rides an overhead bridge and drops through the stone to break a raw slab down into rough tops and straight cuts. It is the muscle of the front end, and it is where the layout you planned on paper or on screen finally turns into pieces you can pick up.
Its job
Break raw slabs into rough tops and straight cuts
How
Diamond blade on a moving overhead bridge
Runs wet
Yes
In the flow
First real machine, right after templating
Who runs it
Run by the sawyer
How a bridge saw works
A circular diamond blade, commonly about 14 to 24 inches across, spins on a motorized head that hangs from a bridge, or gantry, running the length of the machine.
The head travels side to side and front to back over the slab and lowers the blade to cut, while the slab sits on a steel table.
On most saws the table tilts up toward vertical so you can load a heavy slab with a vacuum lifter, and the head rotates 90 degrees to make both long rip cuts and cross cuts without moving the stone.
Water runs on the blade the whole time to cool it and knock down the slurry, so it is a wet, loud machine, and keeping the water and extraction running is part of ordinary cutting.
Unlike the old hand-guided rail saws still found in some shops, a modern bridge saw is programmable: you tell it where the cuts go and it drives itself.
In the shop flow
The saw sits right after templating and programming. The field crew brings back the template, someone nests the parts — laying the pieces out on a digital picture of the actual slab to dodge cracks, pits, and bad color and to line the veining up the way the customer will see it — and then that layout goes to the saw.
Its job is the rough work: cutting the outside perimeter, ripping the slab into manageable blanks, squaring things up.
It can plunge-cut straight-sided openings like a cooktop or a drop-in sink.
Finished profiled work — a polished undermount edge, curves, tight inside corners — goes to the CNC router, or the waterjet, followed by edge polishing, QC and dry-fit, and install.
On straightforward square work a good sawyer can take a piece nearly to finished size on the saw alone, keeping the CNC free for the fussier cutouts and profiling.
3-axis vs 5-axis
A 3-axis saw moves the blade left-right, front-back, and up-down; the blade stays vertical, so every cut is a straight, square-through cut — the large majority of countertop work.
A 5-axis bridge saw, or tilting-head saw, adds the ability to swing and tilt the blade, which lets it cut a 45-degree miter directly on the machine.
Miters build a waterfall end, where the grain appears to pour off the edge of an island and continue down the leg, and a mitered built-up edge that reads as a thick 4cm or 6cm slab from two folded pieces of 2cm or 3cm.
On a 3-axis saw those miters get cut by hand or on the CNC; on a 5-axis saw the sawyer programs them into the same run.
Some shops go further with a sawjet, which pairs the saw blade with a waterjet head so it can also cut curves and inside corners; Park Industries builds one, and it lives in the same corner of the shop even though it is a different tool.
Who runs it, and moving up
This is a real skill ladder, not a title. One operator loads the slab, opens a file somebody upstream already built, hits go, and unloads — useful, and it keeps parts moving. The sawyer — a job posting might say bridge saw operator — that a shop leans on does more than run files.
Read the slab: shift and rotate every part so the vein carries across a seam and the busy blotch lands under the sink instead of dead center on the island.
Squeeze an extra top out of the square footage before you cut anything.
Learn how blade speed and feed change with a soft marble versus a hard quartzite, when to slow down to keep from chipping a brittle edge, and how to leave the right amount of material for the polisher.
Learning to run the saw takes weeks; learning to program it so you waste less stone and fight fewer problems at install takes years, and it is one of the clearest ways to move up on the shop floor.
Good to know
The saw makes the straight cuts and can plunge-cut straight-sided openings; profiled sink edges, curves and tight inside corners go to the CNC router — or the waterjet, in shops that have one.
Nesting is the real value: laying parts on a photo of the actual slab to match veining and dodge flaws before a single cut is made.
A 5-axis tilting head earns its keep on waterfall islands and mitered built-up edges, because it cuts the 45-degree miter directly instead of sending it to another machine.
Well-known saws include Park Industries, built in the US, alongside Italian imports from GMM, Sasso, Denver, Achilli, and Prussiani.
Anyone can run someone else's cut file; the operator who programs the cuts and reads the stone is the one who saves material and prevents headaches at install.
Makes & models you'll hear
Park IndustriesUS-made, most common
GMMBrio
Sasso
Denver
Achilli
Prussiani
A bridge saw — the blade rides the beam overhead while the slab lies flat on the table
Cutting
CNC waterjet
Fewer shops, usually the bigger onesFlow · OMAX · WARDJet · Techni Waterjet›
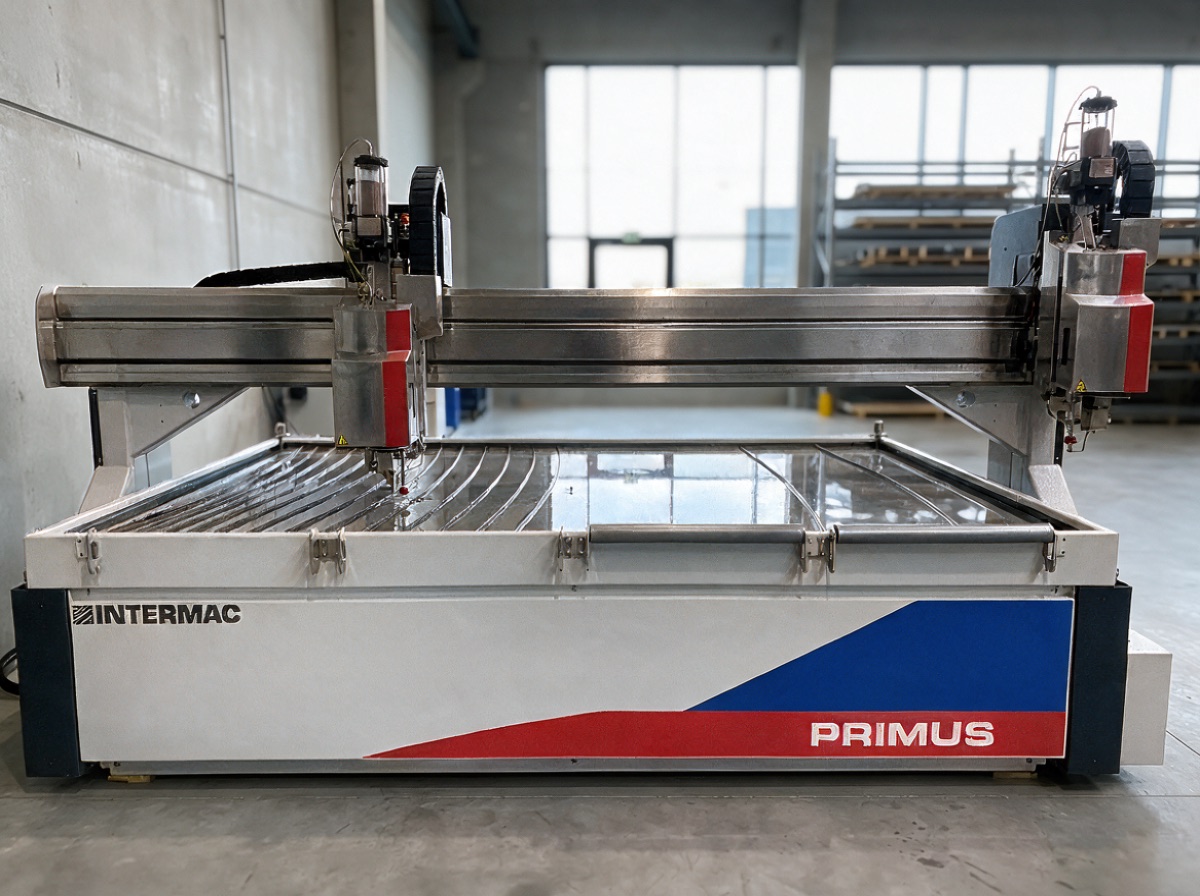
Waterjet stone cutting uses a high-pressure stream of water and abrasive garnet instead of a spinning blade, and a CNC waterjet is the machine that does it. Because the cutting "tool" is a pencil-thin jet, it can turn corners, carve tight internal radii, and cut shapes a saw blade physically cannot reach. In a countertop shop it earns its keep on the work a bridge saw struggles with: sink and cooktop cutouts, curved islands, inlays, and detailed patterns.
Its job
Cutouts, curves, and inlays a saw can't reach
How
High-pressure water plus abrasive garnet, no blade
Runs wet
Yes
In the flow
Rough cut-out, router follows to finish
Who runs it
Run by a waterjet operator
How the jet cuts
A pump pressurizes water to an extreme level and forces it through a tiny orifice; garnet abrasive is pulled into the stream inside the cutting head. What comes out is a fast, focused jet that erodes through stone.
Cuts granite, quartz, quartzite, marble, or porcelain
The narrow kerf holds much tighter internal radii than a saw, with no overcut at an inside corner
Reach for it on a tight inside corner, a sweeping curve, a keyhole, or a decorative inlay of one stone set into another
A bridge saw cuts fast in straight lines; a waterjet cuts almost any 2D shape, just more slowly
Where it sits in the flow
Field measurements come off a template job, the program gets drawn and nested on the slab (often over a photo of the actual slab so the operator can dodge cracks and place the veining where the customer will see it), and then the cutting happens.
In many modern shops the waterjet does the rough cut-out and the CNC router follows behind to profile and polish the edge
The waterjet's advantage is the cutout and the shape; the router's is the edge profile and the polish
Knowing which machine should do which part of a piece is a real part of the operator's skill
The sawjet hybrid
The very common hybrid worth knowing is the sawjet — a single bridge machine that carries both a saw blade and a waterjet head.
The blade rips the long straight cuts fast; the jet handles corners, curves, and cutouts without moving the slab to a second table
Often the answer for a shop that wants waterjet capability without giving up saw speed
Park Industries and BACA Systems build sawjets aimed at the countertop trade; Flow, OMAX, WARDJet, and Techni Waterjet come from the broader industrial waterjet world
Who runs it — and how you move up
The hardware has gotten reliable, but running it well is a craft, which is why people say the machine and the operator are two different things. Because fewer shops run a dedicated waterjet, operators who genuinely know the machine are scarce, and that experience travels well.
Manages the garnet feed and keeps the orifice and mixing tube in spec — those are wear parts that drift as they wear
Sets the right cut speed for the material and thickness; slabs run 2cm and 3cm and the jet behaves differently through each
Knows when to slow the jet for a clean edge versus push it to save time
It runs wet, so water handling and keeping the tank and abrasive system healthy is part of the daily routine
Good to know
The abrasive is garnet, and it is a real consumable — abrasive and the wear parts in the cutting head are an ongoing cost, not a one-time buy.
The orifice and mixing tube wear out and change how the jet cuts; part of running clean edges is catching that drift before it shows up in the work.
Quartz and quartzite are different materials — engineered quartz versus natural stone — and a waterjet handles both, but the operator sets speed and feed differently for each.
Many shops pair the waterjet for cutouts and shapes with a CNC router for the edge profile, so the two machines complement each other rather than compete.
A sawjet folds a saw blade and a waterjet head onto one machine — usually a single bridge, though some designs mount the head on a robotic arm — which is how a lot of shops get curve-and-cutout capability without giving up straight-line saw speed.
Makes & models you'll hear
Flow
OMAX
WARDJet
Techni Waterjet
An Intermac waterjet — a high-pressure jet of water and abrasive cuts curves a blade can't
Cutting
Sawjet
Shops that want both cuts without buying two machinesPark Industries · BACA Systems · Prussiani · GMM›
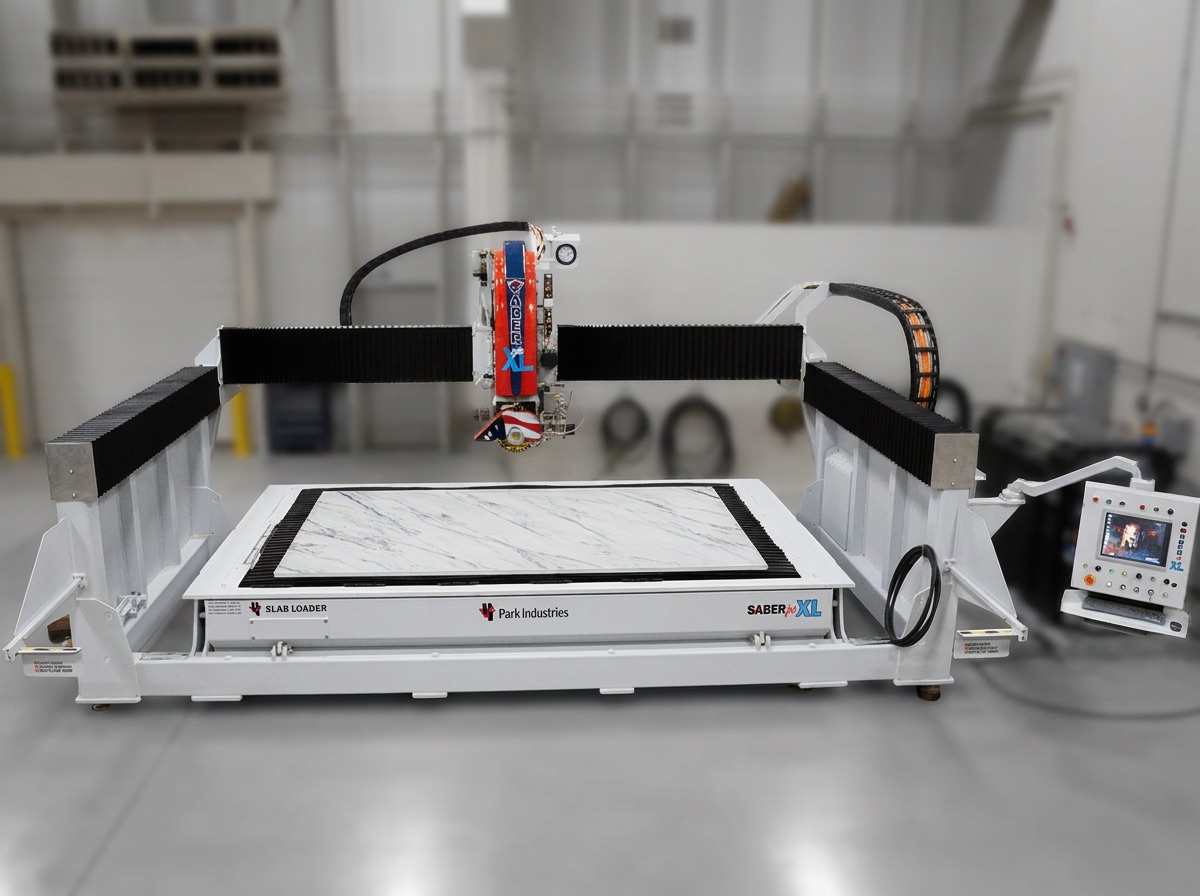
A sawjet is a single CNC cutting machine that carries both a circular saw blade and an abrasive waterjet head, so one machine handles straight blade cuts and curved cuts or interior cutouts. Most are a bridge/gantry; some (like BACA's) use a robotic arm. You rip a slab down to size with the blade, then let the waterjet pierce and carve the sink hole, tight inside corners, and curves cleanly, without the corner overcut a blade leaves. It is the tool a shop reaches for when it wants both capabilities but does not want to feed two separate machines.
Its job
Straight and curved cuts on one machine
How
Saw blade plus waterjet head on one machine
Runs wet
Yes
In the flow
First cut, after templating
Who runs it
Run by a saw operator or CNC hand
How it cuts
The sawjet puts both heads on the same bridge, and each does what it's best at.
The blade does long straight rips at speed.
A blade can plunge into a slab, but its diameter leaves an overcut at inside corners and can't follow a curve or tight radius.
The waterjet plunges straight down through the stone and follows any curve the program draws, so enclosed cutouts and curved edges come out clean.
Where it sits
Cutting comes after the field templater brings back the digital template and someone programs and nests the parts on the slab; the material gets cut before it goes to the CNC router for edge profiling and final cutouts. The combined machine earns its keep mainly on handling and floor space.
The slab is set once and both operations run off the same program and the same zero point.
Parts come off cut to the programmed geometry, ready for the CNC router or straight to edge polish.
It avoids the two setups, two chances to crack a piece in the move, and two machines eating floor.
Suits a shop that values one setup and a smaller footprint; larger operations sometimes still run saw and waterjet separate so each stays busy on its own queue.
Saw vs jet
The waterjet drives a very high-pressure stream of water mixed with garnet abrasive through a small nozzle; the abrasive slurry erodes the stone.
It cuts granite, quartzite, porcelain, and quartz surfacing cleanly, without the chipping a blade can give on a brittle edge.
Narrow and cutting cold, it holds a tight inside radius and nests parts close together to save material on an expensive slab.
The tradeoff is speed: the jet is slower than the blade on a long straight line and burns garnet, a real consumable.
A good operator plays to each head, blade for the perimeter rips, jet for the cutouts and curves.
Who runs it, and how you move up
These run under CAD/CAM software, so the operator's day is part programming and part material handling: lay out the parts on a photo or scan of the actual slab to dodge fissures and place the veining, set the blade cuts and jet paths, load the slab, and let the bridge run. Most cutting is done wet.
Start on the saw side and on loading and unloading slabs.
Learn to read a slab and nest parts without wasting material.
Grow into running the waterjet programs and tuning cut speeds.
A strong rung toward full CNC work, because the programming habits carry straight over to the router.
Good to know
A blade can plunge but leaves an overcut at inside corners, so tight or curved enclosed cutouts are the waterjet's job, not the blade's.
The waterjet cuts with garnet abrasive in the water stream, not water alone, and that garnet is a real running cost most newcomers overlook.
Because both heads share one setup and one zero point, parts come off the table already squared to each other, which cuts down on rework at the router.
Slab thickness is usually 2cm or 3cm, and a good operator sets blade speed and jet pressure to match the material and thickness.
Nesting parts smartly on the actual slab image is where an operator saves the shop real money, dodging fissures and lining up the veining before a single cut is made.
Makes & models you'll hear
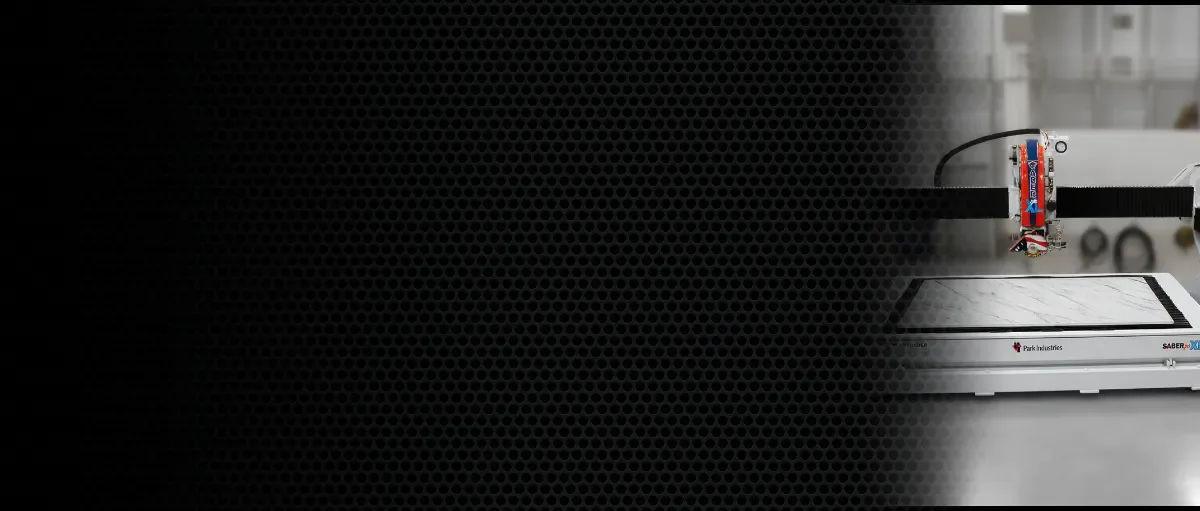
Park IndustriesSABERjet
BACA Systemsrobotic
Prussiani
GMM
Insider word. "Sawjet" is US shop slang almost nobody outside the trade searches for — which is exactly why using it correctly signals you belong in the building.
A sawjet — a saw blade and a waterjet head on one bridge, over a loaded slab
Machining
CNC router / workcenter
Common in production shopsPark Industries · Northwood · Breton · Intermac · CMS/Brembana · Sasso›
A stone CNC machine — a computer-controlled machining center — takes a rough-cut piece of stone and does the precise work: profiling and polishing edges, drilling faucet holes, cutting out sink and cooktop openings, and machining drainboard grooves. It works off a program built from the digital template, holding the piece down on vacuum pods while a spinning spindle swaps tools and follows the path. On most floors it is often the busiest machine in the building.
Its job
Edges, holes, cutouts, and drainboard grooves
How
Spindle swaps tools, follows a programmed path
Runs wet
Yes
In the flow
After the bridge saw's rough cut
Held by
Vacuum pods
Who runs it
Run by the machine operator
What it does
It does nearly everything that turns a rough blank into a finished-looking countertop, then polishes it. It's a wet machine — water feeds the tools to keep them cool and knock down dust, usually paired with extraction, and that spray-and-slurry is just ordinary shop practice.
Runs the edge profile: eased, bullnose, ogee, mitered edges
Bores the holes for the faucet and soap dispenser
Plunges and cuts the sink and cooktop openings
Machines radius corners; on farmhouse or drainboard jobs, cuts the flutes and reveals
Runs polishing passes with progressively finer wheels until the edge shines
Where it sits
A crew templates the job in the field, someone back at the shop turns that template into a program and nests the parts on the slab, and the bridge saw rips the blanks to rough size. Those blanks land on the CNC. On most floors it is often the busiest machine in the building.
3-axis vs 5-axis
The stone is held on vacuum pods or a vacuum bed — rubber-topped cups you position under the part so the machine can lift at the far end without the piece shifting. Setting those pods so they clear the toolpath and never sit where a cutout drops out is a real skill, and getting it wrong is how you snap a piece or crash a tool. Most shops running 2cm and 3cm quartz and natural stone lean on the machine hard, because the repeatability beats hand-routing every edge.
3-axis moves the spindle in X, Y, and Z and covers most flat-top work
5-axis tilts and swivels the head — for mitered edges, angled undermount reveals, and any profile that isn't straight up and down; it does in one setup what a 3-axis would need multiple flips and hand-finishing to fake
Who runs it — and how you move up
'Machine operator' at the CNC is the vaguest job title in the trade. At one end it means a genuine programmer who reads the template, builds and nests the program, and picks tooling and feeds and speeds; at the other it means someone who loads the pre-nested part, sets the pods, and presses cycle-start while the office writes the programs. Both get called the operator, so the real question on any posting is who writes the programs and who just runs them. The operators who can program are the ones a shop fights to keep.
Start: loading, setting pods, changing worn tooling, watching cycles for a dragging tool or a chattering part
Next: editing a program at the machine — nudge an offset, tweak a dull polish pass, reorder cuts so a fragile corner is supported until last
Above that: nesting whole jobs to save material and dodge fissures, dialing feeds and speeds per material, and building the mitered and drainboard programs a loader never touches
Good to know
Vacuum-pod setup is the whole game — place a pod where a cutout drops out and you'll crash a tool or crack the piece, so clearing the toolpath matters as much as running it.
3-axis handles flat tops and standard edges; 5-axis earns its keep on mitered buildups and angled undermount reveals that a 3-axis can only fake with extra flips and hand work.
Quartz, marble, and quartzite each cut differently — feeds, speeds, and tooling that give a mirror polish on one will burn or chip another, which is why material knowledge separates operators from loaders.
The CNC is a wet machine: water on the tools is normal practice, and it's what keeps the diamond tooling alive and the cut clean.
When a job title says 'machine operator,' always ask who writes the programs — that one answer tells you whether it's a skilled seat or a load-and-start seat.
Makes & models you'll hear
Park IndustriesTITAN, SPARTAN
Northwood
BretonContour
IntermacMaster
CMS/Brembana
Sasso
Finishing
Edge / line polisher
Common in production shopsPark Industries · Comandulli · Marmo Meccanica · Sasso · Achilli›
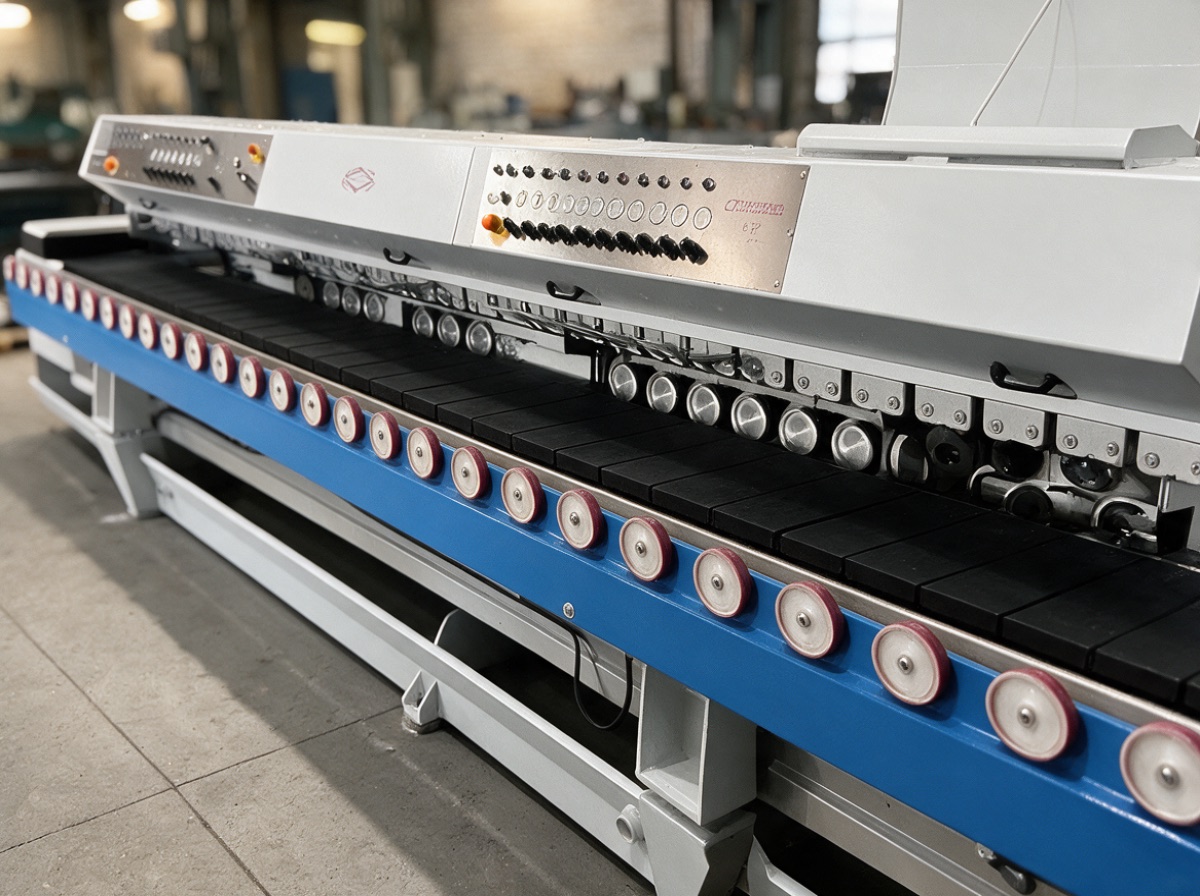
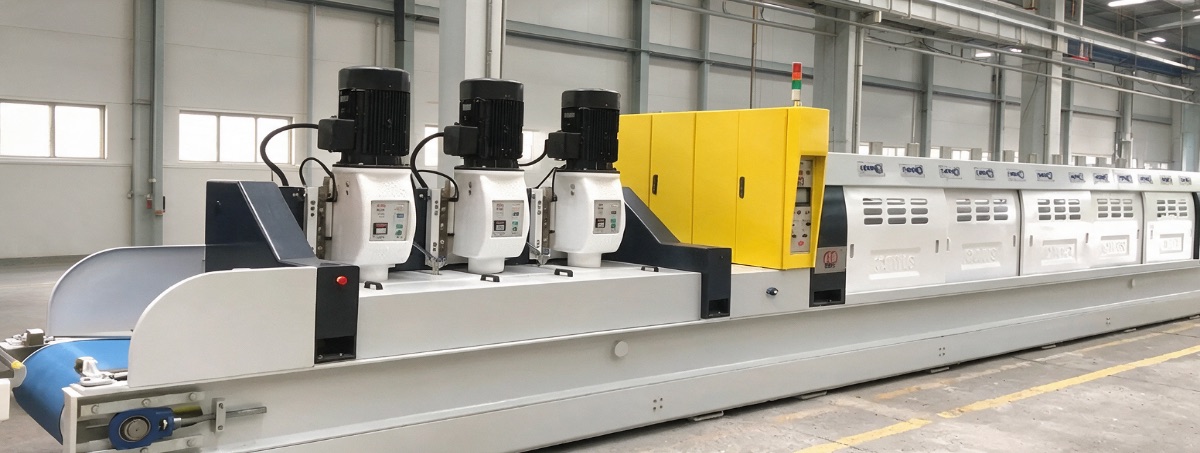
An inline edge polisher — the trade calls it a straight-line or line polisher — feeds a straight length of countertop past a row of spinning diamond wheels and comes out the far end with a finished, polished edge. It automates the grind-and-polish sequence a fabricator would otherwise do by hand, and it earns its keep on long, straight runs where hand work would eat hours.
Its job
Polishes long straight countertop edges
How
Row of spinning diamond wheels, coarse to fine
Runs wet
Yes
In the flow
Finishing, after the saw and CNC
Who runs it
Run by a hand polisher
How it works
Picture a conveyor with a gang of tooling heads mounted over it. The slab piece rides a belt or driven pads, clamped square against a fence, and moves through at a set feed rate. Water floods every head to cool the diamond and carry the slurry away — normal wet stone work.
A series of overhead diamond wheels step from coarse to fine
First heads hog off material and establish the edge shape
Middle heads refine it
Last heads bring up the gloss with resin-bond polishing wheels
The profile — pencil-round, half-bullnose, eased square, bevel — is set by which shaped wheels sit in the heads and how they're dressed
Where it sits in the flow
Edge polishing is a finishing step: the piece has already been cut to size on the bridge saw, and any cutouts and inside corners have been handled on the CNC router. The line polisher only does the outside straight edges, taking the boring, repetitive linear footage off the crew's plate and leaving the geometry that needs judgment to a person.
Can't reach into an inside corner
Can't follow an edge that curves in plan
Can't profile around a cutout
Those still get finished by hand or on a CNC edge-profiling head
Big win on an island with four long straight sides; less so on a fussy piece with curves and returns
Basic vs programmable
There's a real range in what these machines are. Thickness is part of the setup too — a shop running 2cm and 3cm material sets the heads for the stock it's feeding.
A basic straight-line polisher does one flat edge and leaves the operator an unfinished top and bottom arris to knock off
A fuller machine adds chamfering heads that ease the top and bottom edges in the same pass
Higher-end lines are effectively programmable — select a profile, dial in the thickness, and the heads position themselves
Quartz is engineered and behaves predictably; quartzite is natural stone with harder, variable grain
A good operator adjusts feed speed and reads the polish off the last head rather than trusting one setting
Who runs it — and how you move up
How automated a shop's edge work is tells you a lot about the hands who work there. A shop that pushes every straight edge through a line polisher is fast and consistent, but its people may have spent less time developing the feel for hand-polishing an edge to match. A shop that finishes more edges by hand tends to have deeper finishing skill in its crew — the person who can blend a hand-polished return into a machine-polished run so the seam is invisible, or bring a botched edge back without a redo. Learning to run the line polisher is a quick skill; learning to make a hand-polished edge indistinguishable from the machine's takes years, and it's the one that makes you hard to replace.
Good to know
The line polisher only does straight outside edges — inside corners, curves, and anything around a cutout still get finished by hand or on the CNC.
The profile lives in the wheels, not the machine: coarse-to-fine diamond heads shape and polish in one pass, and the last resin heads bring up the gloss.
Quartz and quartzite are not the same material — engineered quartz polishes predictably, natural quartzite has harder variable grain, so the operator adjusts feed speed and reads the edge.
Water flooding the heads is normal wet-cutting practice; it cools the diamond and flushes the slurry so the wheels cut clean.
A shop that hand-finishes more of its edges usually has deeper finishing skill on the floor — running the machine is easy, matching it by hand is the years-long skill.
Makes & models you'll hear
Park IndustriesFASTBACK
ComandulliSpeedy
Marmo Meccanica
Sasso
Achilli
An inline edge polisher, diamond wheels working a slab edge under water
Prep
Calibrating & surfacing line
Bigger shops and slab plants, not typical shopsBreton · Pedrini · Simec · Barsanti Macchine›
A calibrating and surfacing line is a conveyor-fed row of grinding heads that takes a raw slab down to one consistent thickness and a dead-flat face. It is upstream prep that happens at a slab plant, importer, or large producer — it brings every slab in a lot to a consistent nominal 2cm or 3cm and a flat face, within tolerance, before anyone fabricates it. You will hear the term more than you will run the machine, because most shops buy slabs that are already calibrated.
Its job
Takes a raw slab to one thickness, dead-flat face
How
A conveyor-fed row of grinding heads
Runs wet
Yes
In the flow
Upstream prep at the slab plant
Common
Slab plants and large producers, not typical shops
Who runs it
Run by slab-plant production operators
How the line works
A slab travels on a conveyor under a row of gang heads or spindles, each carrying an abrasive or diamond tooling segment that takes down the high spots until the whole face sits at one thickness.
First heads are aggressive calibrating segments that hog off material
Later heads step down through finer grits, leaving a raw flat surface ready for further work or a honed/polished finish depending on setup
The slab is referenced off the bed and pulled through at a set feed rate, so output is flat and dimensionally consistent within tolerance
Many lines run wet with water over the heads, ordinary practice for this grinding
Why slabs get calibrated
Raw material is not perfectly uniform, so the line brings every slab in a lot to the same nominal thickness and a flat plane before anyone polishes or fabricates it.
A block sawn on a gangsaw or wire yields raw slabs that vary in thickness and can have saw marks or a slightly cupped face
A bridge saw and a CNC both assume a known, even thickness, and edge polishing looks even only if the referenced face is flat
In quartz and engineered-surface production it is even more central: the slab comes out of the press slightly oversize, and the line establishes the finished thickness and gauged surface
Where it sits in the flow
Upstream prep, not part of the day-to-day shop cycle of template, program, cut, profile, polish, install
Most shops buy slabs already calibrated and polished by the quarry, engineered-stone plant, or distributor, and never touch a line
The machines are big, occupy a long run of floor, and are fed by overhead cranes and slab handling, so they live in slab plants, large importers, and bigger vertically-integrated fabricators
The takeaway is to recognize the term: it describes how a slab got flat and gauged before it reached your saw
Who runs it — and how you move up
Running a line is a slab-plant or production operator job that leans toward heavy-machine and production discipline rather than the layout, math, and finish judgment a shop builds. It is worth knowing the role exists, but it is not the path most people take into countertop fabrication.
Loading and unloading with cranes and clamps
Watching head wear and swapping abrasive segments
Dialing in feed rate and head pressure for the material
Checking thickness with calipers or gauges as slabs come off
Good to know
Calibrated means brought to one true thickness and a flat plane, so a slab labeled 2cm is actually a consistent 2cm edge to edge.
Most fabrication shops never run one of these — you buy slabs that a quarry, engineered-stone plant, or distributor already calibrated and polished.
It is a line of gang heads a slab rides under on a conveyor, starting coarse to hog off material and stepping to finer grit, usually run wet with water.
It is upstream material prep, not part of the shop's template-cut-profile-polish-install cycle.
Quartz and other engineered surfaces come out of the press slightly oversize, so calibrating is what sets their finished thickness and flat face.
Makes & models you'll hear
Breton
Pedrini
Simec
Barsanti Macchine
A calibrating line bringing a slab to even thickness
Finishing
Hand & wet-finishing tools
In every shop and on every truckAlpha Professional Tools · Makita · Flex · Diarex · Metabo · Weha›
This is the family of handheld tools that finishes what the big machines start: wet polishers fitted with diamond pads, angle grinders, diamond core bits and hole saws, small hand routers and profile wheels, and the dust extraction that runs alongside them. Almost all of it is worked wet, with water fed onto the stone to cool the diamond tooling and keep dust knocked down. A bridge saw and a CNC can machine a straight run or a repeatable cutout, but a person with a wet polisher is what makes an inside corner, a seam, and a faucet hole look right.
Its job
Finishes what the big machines start
How
Diamond pads, grinders, core bits, hand routers
Runs wet
Yes — mostly, to cool the diamonds
In the flow
Finishing, in the shop and on install day
Who runs it
Run by fabricators and install crews
How to polish granite edges by hand
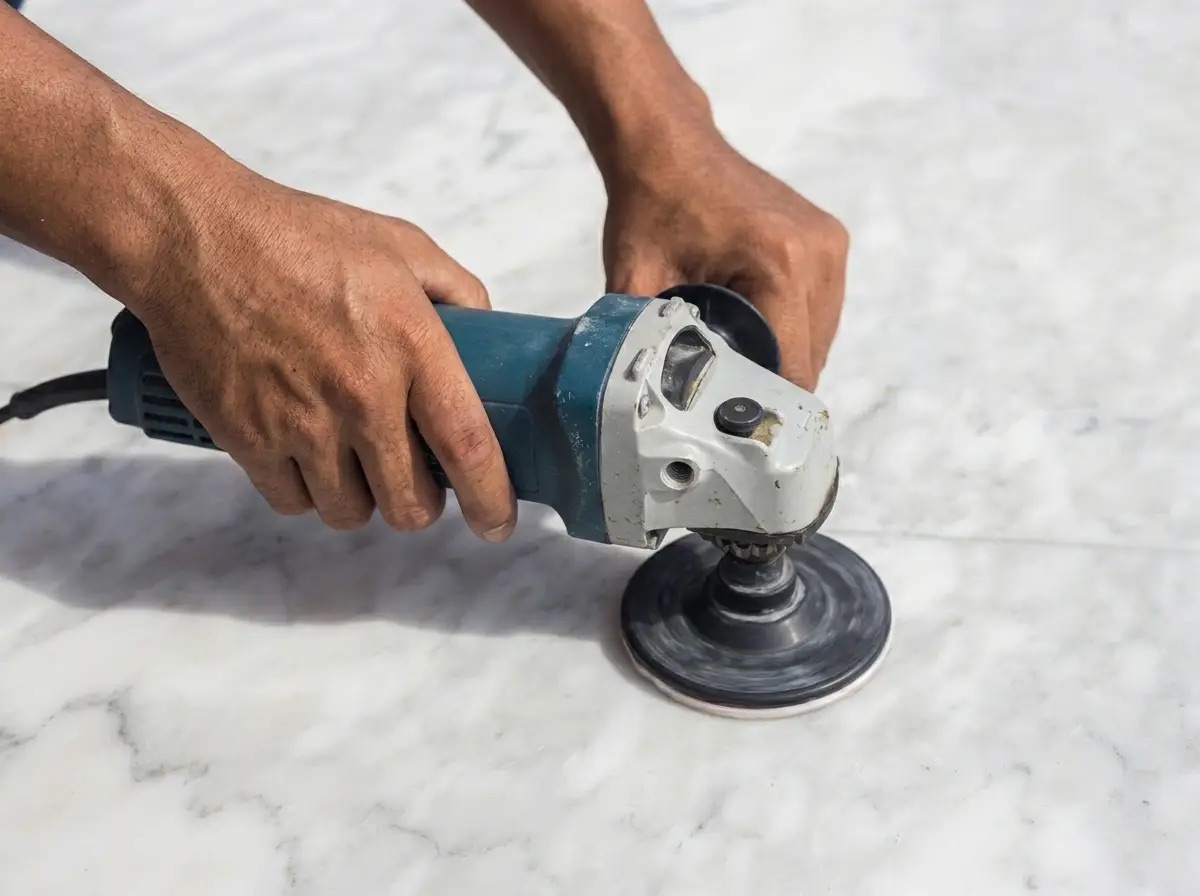
The workhorse is the variable-speed wet polisher — a right-angle, grinder-style tool with water fed through the center to a hook-and-loop backing pad. You run a progression of diamond pads to bring the stone back to the same sheen as the factory-finished face of the slab.
Start coarse and step up through the grits until it matches the factory-finished face
The common wet run is a seven-step set — 50, 100, 200, 400, 800, 1500, 3000 — often finished with a buff
On granite or quartzite you chase a real shine; on a honed or leathered finish you match a softer, low-gloss surface
Variable speed matters: slow down for fine pads and delicate edges, speed up for stock removal
The grinder and holes
Alongside the polisher sits the angle grinder, run dry or wet with a turbo or segmented diamond blade for fast, aggressive work — trimming an overhang, knocking down a high spot, cutting a relief before you clean it up wet. It rewards a steady hand and punishes a careless one, so newcomers spend real time here before they touch a finished edge.
Faucet and soap-dispenser holes are cut with diamond core bits or hole saws in a wet-capable drill
Drill wet, often at a slight angle to start so the bit doesn't wander, then bring it vertical
Blowouts on the underside are a classic rookie mistake — ease off as the bit breaks through, or back-drill from beneath
Edges by hand
Hand routers and profile wheels shape and touch up an edge. A profile — an eased edge, a bevel, a bullnose, an ogee — might be cut on the CNC for a long straight run, but the router and shaped diamond wheel carry that same profile around a radius, into a corner, or across a seam so the edge reads as one continuous line. It's genuine hand skill: matching a machine-cut profile by feel so a customer can run a finger along the joint and not catch it. The same tools handle repairs and touch-ups when a chip shows up during install.
Dust, water, and moving up
Dust extraction ties the kit together. Most of this work is done wet because water cools the diamonds — making tooling last and cutting cleaner — and keeps dust down, whether in the shop or standing in someone's kitchen on install day.
Shop: water lines run to the tools and slurry drains to a settling system
Field: a wet setup, or a grinder paired with a shrouded guard and a vacuum
Skill ladder runs from grinder and blockout work, up to drilling holes and running a polisher on flat faces, and finally to the finish work — seams, inside corners, and finished edges — that a lead fabricator owns, because a mistake there shows on the customer's counter
Good to know
Polishing is a grit progression, not one pass — skip a step and you'll see swirl marks and dull patches once the water dries off the stone.
A 2cm slab often gets its exposed edge built up to look like 3cm by laminating a strip underneath, and blending that seam by hand is a core finishing skill.
Quartz and quartzite are not the same material and don't finish the same way — quartz is a man-made engineered surface that can scorch or discolor if you run a dry grinder too hot on it, while quartzite is a natural stone that takes a hard polish.
Wet work is done wet mainly to cool the diamonds and clear the cut; a pad or core run dry glazes over, stops cutting, and burns out fast.
Judge a finished edge the way a customer will — run a bare finger along the seam and the profile; if you can feel the joint, it isn't done.
Makes & models you'll hear
Alpha Professional Toolspolishers & pads
Makita
Flex
Diarexcores & pads
Metabo
Weha
A fabricator hand-polishing stone with a variable-speed wet polisher
On site
Seam setter
In every install truckOmni Cubed · Abaco · Weha · Integra Adhesives›
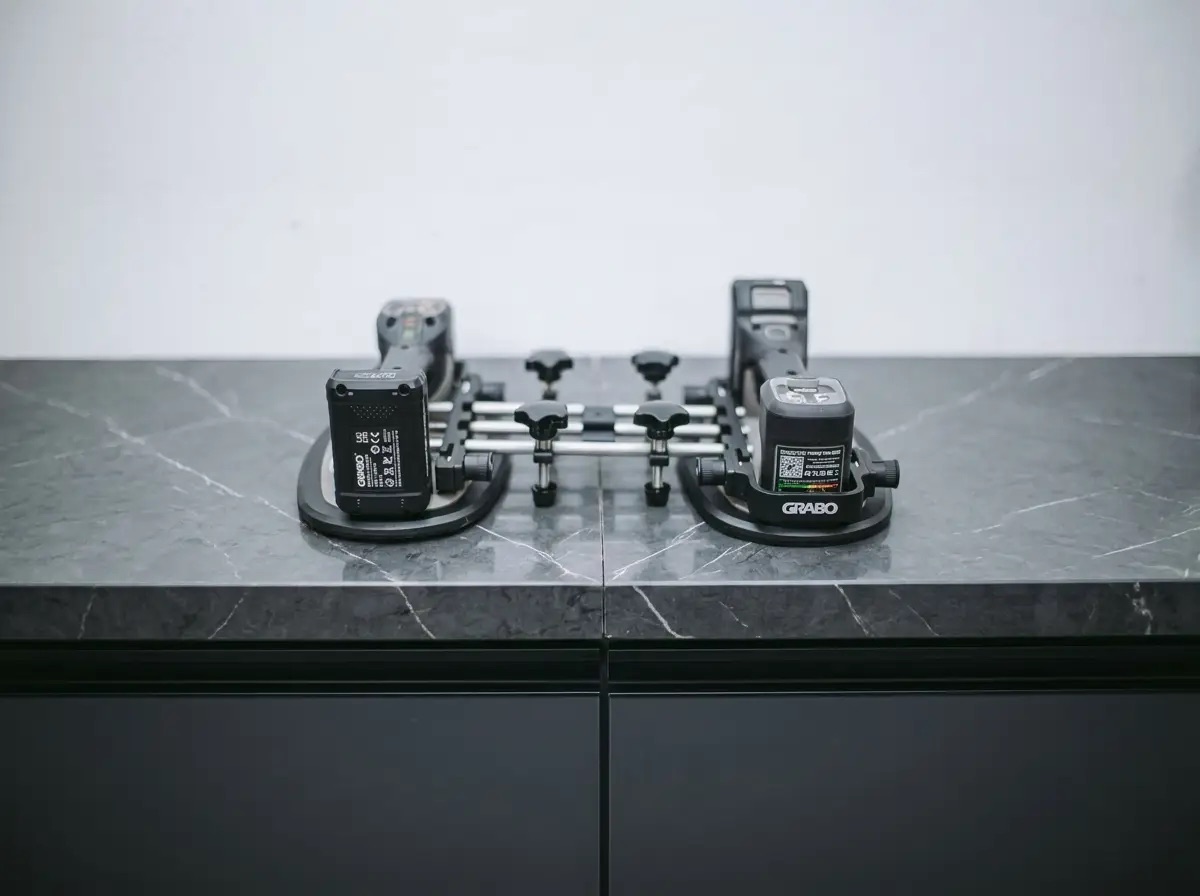
A seam setter is the on-site clamping tool that pulls two pieces of stone together at a seam and holds them dead flat while the adhesive cures. Vacuum pads grip each slab, a threaded mechanism draws the two edges tight, and most modern setters also raise or lower one surface so the joint ends up flush with no lippage. It is the difference between a seam you can feel with your fingernail and one a customer never notices. You'll often see it sold as a granite seam setter, but the same tool works the same on quartz.
Its job
Pull two stone pieces tight and hold them flush
How
Vacuum pads, a threaded draw, and leveling screws
Runs wet
No
In the flow
Install day, on site in the kitchen
Run by
The install crew
Pull and level
The two jobs a setter does are pull and level, and beginners tend to only think about the pull.
Pull is the easy half — the threaded rod or ratchet closes the gap and squeezes adhesive out so the joint reads as a hairline.
Level is the harder half: lippage, one side sitting proud of the other. Even 2cm or 3cm slabs off the same saw can sit at different heights on cabinets that aren't level, and a seam you can catch with a fingernail is a callback waiting to happen.
Better setters have independent up-and-down leveling at each pad, so you can nudge one piece into the same plane as its neighbor before the glue sets.
On stone with a lot of movement or a busy pattern, you're also lining up veins and color across the joint — real hand skill in getting tight, flush, and matched all at once.
On install day
By the time a seam setter comes out, the field template has been shot, the pieces cut on the bridge saw and profiled on the CNC, the edges polished, and the crew is dry-fitting two sections that meet at a seam. It's an install-day tool, not a shop machine. The run of the job goes:
Clean and dry both edges, then lay your color-matched seam adhesive.
Set the vacuum pads on each piece and pump them to grip.
Work the draw mechanism to close the gap and the leveling screws to bring both surfaces into one plane.
Hold it, tool the squeeze-out, let it kick, pop the pads, and move on.
A good crew makes it look quick because they've done it a thousand times.
Flavors of setter
Setters come in a few flavors, and shops pair them with the rest of the install kit.
The simplest are two vacuum cups with a screw that pulls them together — light, cheap, fine for a short seam.
The workhorses add leveling and a longer reach so you can span a wide miter or an island seam.
Vacuum can be hand-pump or, on some rigs, powered; the pads are a wear item you keep clean and check for a good bite before you trust them on an overhang.
Pair it with leveling shims under the cabinets, a straightedge across the joint, and a color-matched two-part adhesive mixed and tinted to the stone. The setter holds the geometry; the adhesive holds the bond.
Who runs it — and how you move up
The skill ladder here is short but real.
On your first installs you run the setter under someone's eye — learning how hard to pump the vacuum, how much to close before you crush the adhesive, and how to read the joint with your fingers and a raking light instead of just your eyes.
Within a season most installers own the seam completely: choosing where it falls back during templating so it lands somewhere forgiving, prepping edges so they mate clean, and leveling by feel.
A clean, flat, tight seam is one of the clearest signs of a crew that knows what it's doing — a big part of what separates a fabricator's finished job from an amateur one.
Good to know
Lippage — one side sitting proud of the other — is what customers actually notice, so leveling at the seam matters as much as closing the gap.
Where a countertop seam falls is planned at templating and set in the shop layout, not improvised at install; a seam at an inside corner or over a cabinet run is far easier to hide — and to support — than one across a wide, open island. A seam across the dishwasher opening is inconspicuous but unsupported, so it needs a rail or bracket under it.
Vacuum pads are a wear item — keep them clean and check the bite before you trust them, because a pad that lets go on an overhang can crack a piece.
Match your seam adhesive to the stone: two-part, mixed and tinted to the color, so the cured joint reads as a hairline instead of a dark line.
Tool the squeeze-out while it is fresh and let the glue fully kick before you release the pads — rushing the release is how a flush seam turns into a stepped one.
Makes & models you'll hear
Omni Cubed
AbacoEasy Work seam setter
Weha
Integra Adhesivesseam adhesives, not setters
A seam setter — vacuum cups and threaded rods that pull two pieces tight and flush at the joint
Shop system
Water reclaim & slurry management
In nearly every wet shopWater Treatment Solutions · Ecogreen · Sludgehog, or a shop-built settling pit›
Almost every machine in the shop runs wet — the saw, the CNC, and the hand polishers all flood water onto the stone to cool the tooling and keep the dust down. Water reclaim is the system that catches that water and the fine stone slurry it carries, drops the solids out, and — in most shops — recycles the cleaned water back to the machines. It is the quiet utility that lets a shop run wet all day without flooding the floor or packing a drain with mud.
Its job
Catches wet-cutting water, drops out solids, recycles it
How
Settling tanks and pits, often a filter press
Slurry
Can't go down a drain; sets rock-hard
In the flow
Background utility behind every 'runs wet' machine
Who runs it
Everyone keeps it running
How the loop works
Cutting and grinding stone wet produces a steady stream of gray, gritty water — water plus a fine suspension of powdered stone the trade calls slurry. That slurry can't just go down a drain: it settles into a rock-hard sludge that blocks pipes, and most sewer authorities won't accept it. So a wet shop either hauls water in and out constantly, or it closes the loop with a reclaim system:
The machines drain into a channel or pit in the floor
The water is pumped through the reclaim gear
The solids are separated out
The cleaned water goes back to a holding tank the machines pull from again
Settling vs filter press
There are two common approaches, and shops often combine them:
Settling system (the simple version): pits or tanks where the water slows enough for heavy stone fines to sink, usually helped by a flocculant — a treatment chemical dosed in to clump the finest particles so they settle too. Clarified water off the top gets recycled; sludge at the bottom gets dug or pumped out periodically.
Filter press (the automated version): squeezes the collected slurry between plates until it comes out as dry, stackable cake you can throw in a dumpster, and returns even cleaner water to the loop.
Bigger shops run a full clarifier-and-press setup; smaller shops run settling tanks and shovel the pit.
Where it sits
This is shop infrastructure, not a machine you fabricate on, but it sits behind every 'runs wet' line you hear about the saw, the CNC, and the polishers, and it's in nearly every shop that cuts stone. It runs in the background, so newcomers rarely think about it until it clogs — or until the recycled water gets so loaded with fines that it stops cooling the tooling properly and starts leaving a film on the finished stone. A neglected system quietly fouls tooling and finishes across every machine at once, which is why keeping the settling working and the water reasonably clean is part of why a shop stays productive.
What a learner carries
Slurry is not just dirty water but a disposal responsibility
The fines have to come out or they wreck your finish
Keeping the reclaim healthy — cleaning the pit, dosing flocculant, emptying the press — is unglamorous work that keeps every other machine cutting clean
It's the honest, practical side of the 'we work wet' story: the water cools the diamonds and keeps dust down, and the reclaim system is what makes running wet all day actually workable
Good to know
Stone slurry can't go down a normal drain — it settles into a concrete-hard sludge that blocks pipes, so a wet shop recycles its water instead of dumping it.
A flocculant is dosed into the settling tanks to clump the finest stone particles so they drop out; the clarified water off the top goes back to the machines.
A filter press squeezes the collected slurry into dry, stackable cake you can toss in a dumpster, and returns cleaner water to the loop.
When recycled water gets too loaded with fines it can clog the water delivery, cool the tooling less, and leave a film on the stone, so keeping the water clean protects every machine's finish at once.
It's background infrastructure nobody notices until it clogs — which is exactly why keeping it running is quietly part of a shop staying productive.
Makes & models you'll hear
Water Treatment Solutions
Ecogreen · Sludgehog, or a shop-built settling pitclarifier + filter press