
Mitered Edge Countertops: Fabrication and Quality Checks
How mitered countertop edges are made, what affects joint quality, and the questions fabricators and shop owners can use in a hiring conversation.
Contents9 sections
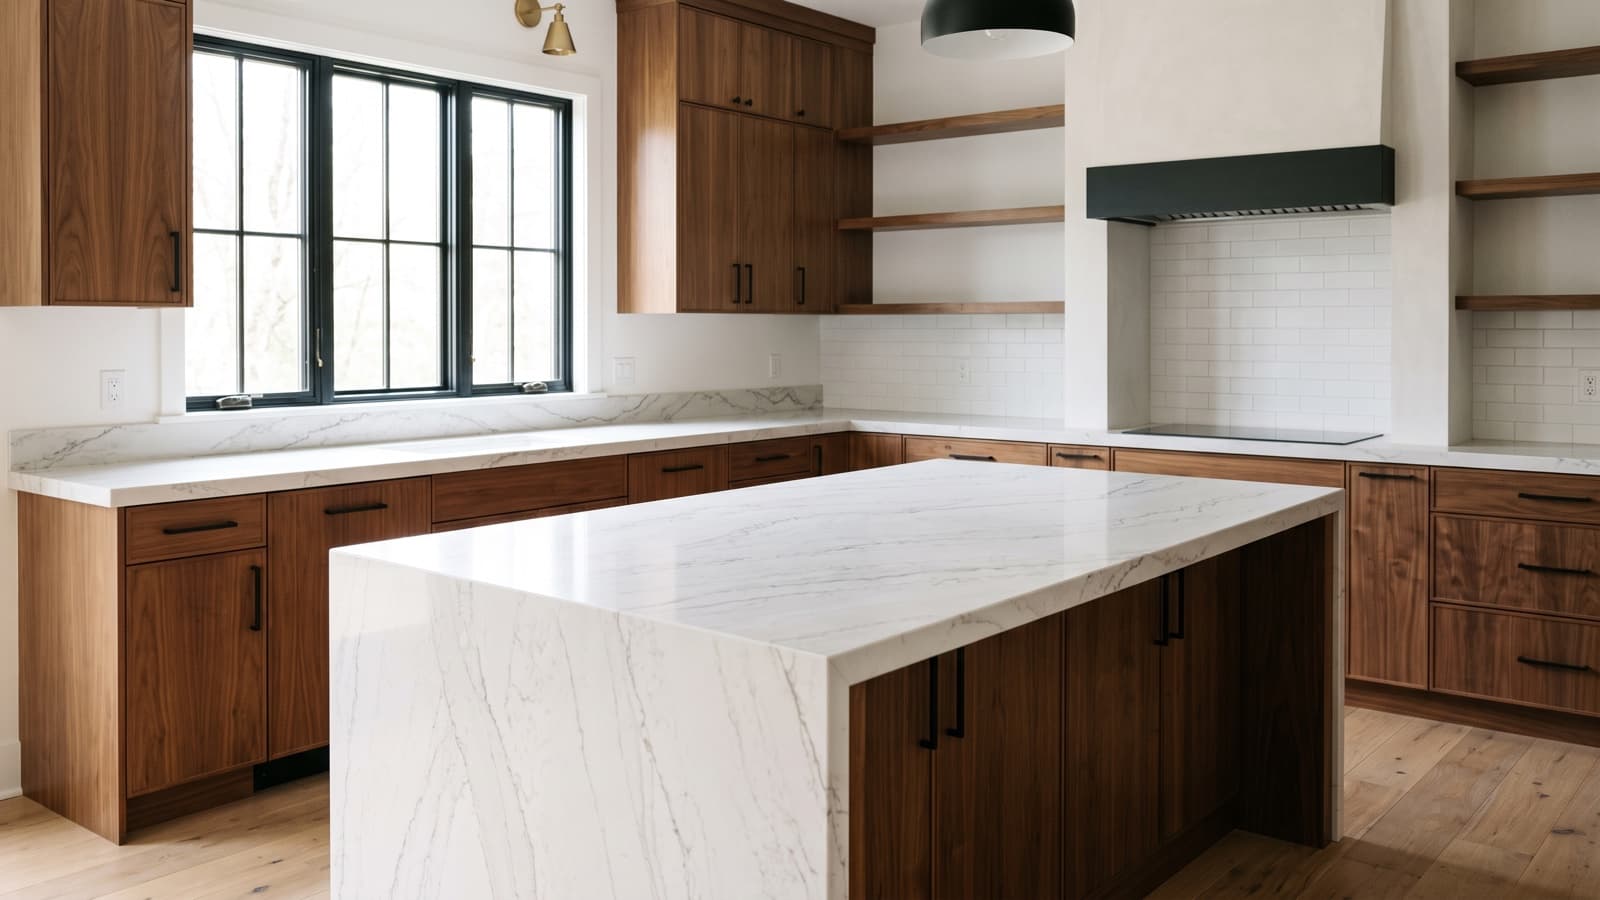
A mitered edge is how a countertop that looks four or six centimeters thick is made from stone that is only two or three. Two pieces are cut at 45 degrees, folded together like a picture frame, and bonded along the bevel. Done well, the corner reads as one solid piece of stone. Done badly, it is the first thing a visitor notices.
For a fabricator or shop owner, the useful question is who handles each part of the joint: layout, cutting, fitting, bonding and finishing. This guide explains the work so you can discuss experience precisely. It is not a machine setup procedure or a specification for a particular material.
Key takeaways
- A miter joins beveled pieces to create an apparent edge thickness; that appearance does not mean the whole countertop is solid stone at that depth.
- Quality depends on layout, cut accuracy, fit-up and finishing together. A photograph cannot establish which person performed those operations.
- Use a candidate’s own project examples to discuss their responsibilities, and follow the material and equipment guidance for actual work.
Why the miter exists at all
Stone slabs are supplied in a small number of thicknesses. For countertops that is effectively 2cm or 3cm — a true 6cm slab is not a normal product, and if it existed it would be twice the weight to quarry, ship, carry up a staircase and support on a cabinet.
The fashion, meanwhile, is for a chunky edge. A 6cm or 10cm apparent thickness reads as substantial and expensive. The miter is how the industry resolves that: keep the slab thin, and build the appearance of mass only where it is visible. The apparent depth is set by how deep the vertical return is cut, not by adding the two slab thicknesses together — 2cm material commonly presents as around 4cm, but it can be taken deeper, without the structural and cost penalty of genuinely thick stone.
That is also why the edge is boxed down rather than solid. A mitered waterfall island is not a block of marble; behind the apron there is a cavity, often with substrate, blocking or reinforcement in it. This is normal, not a shortcut — but it explains why the corner is the vulnerable part.
How the joint is actually cut
The bevel comes off a bridge saw with a tilting head, or off a CNC capable of the operation — not every machine is. The requirement is not just reaching the angle but holding it straight and consistent over the full length of the joint, which on a long run is a real demand on the saw and the setup. A joint that is tight at one end and open at the other is the classic symptom, though it is not diagnostic of any single cause: inaccurate bevels, slab variation, poor fit-up, contamination and uneven clamping all produce it.
The two bevelled faces are test-fitted, bonded with an approved two-part adhesive — epoxy is common, but acrylic, methacrylate and polyester systems are also specified — then aligned, clamped, and the outside corner eased and finished so the arris is crisp and the joint disappears. That finishing is often hand work, though some of it is machine-assisted. A machine can cut the angle; closing the corner so the eye cannot find it is usually a person.
This is the same joint problem as a countertop seam, rotated ninety degrees — but do not assume the countertop field-seam tolerances govern it. A nominal 1/16 inch joint would be a poor acceptance criterion for a visible miter, which should be uniformly tight and aligned to the material and adhesive manufacturers’ instructions and to the agreed specification or sample. We covered the seam numbers, and where they come from, in our piece on countertop seams.
Why 2cm and 3cm behave differently
This is the part most customers never hear, and it is the single most useful thing to know before specifying a miter.
A 45-degree bevel cut across a 2cm slab produces a bevel face of roughly 28mm, and it terminates in a very thin arris — tapering close to nothing unless the fabricator deliberately leaves a small protective land. That thin edge is at its most vulnerable exactly when it is being handled, before it is bonded to anything, and it chips. Thin, brittle or fissured material is the most exposed, and poor support during handling makes it worse.
None of that makes a 2cm miter wrong — both 2cm and 3cm are routinely mitered, and plenty of 2cm miters are cut well every day. It means the material choice and the edge choice are not independent decisions, and a shop that shrugs when you ask how it handles the thickness you have chosen is telling you something.
What a bad miter looks like
Unlike most fabrication faults, these are visible from standing height without any special knowledge.
- An open corner. A joint that is tight along most of its length and opens up at one end. Usually the blade drifted, or the two pieces were not pulled together evenly.
- A dark line. The epoxy was not colour-matched to the stone, so the joint reads as a pencil line around the whole edge instead of disappearing into it.
- Chipping along the arris. Small nicks along the outside corner. Thin, brittle or fissured material is most vulnerable, as is anything poorly supported during handling — hardness is not the same thing as fracture toughness, so a hard stone is not automatically the fragile one. Hardest to hide on a dark polished surface.
- Veining that stops. On a marble or veined quartz, the pattern should carry over the corner and down the face. When it does not, the eye reads the edge as an applied strip rather than solid stone — which defeats the entire purpose of the miter.
- A soft or rounded arris. A slight easing of the corner is normal and desirable; over-easing rounds it off, which reads as cheap and undoes the crisp square look the miter was chosen for.
- Faults you cannot see from the outside. Voids in the adhesive, the joint separating over time, the apron detaching, cracking from movement or inadequate support, inconsistent depth along the return, or missing reinforcement at corners and overhangs. These matter more than the cosmetic ones and show up later.
A good miter shows none of these: a continuous line of stone turning a sharp corner, the pattern running round it, and no joint your eye stops on.
Why it costs more, honestly
Customers often assume the upcharge on a mitered edge is margin. Mostly it is not. A miter adds a second precision cut on expensive material, a bonding operation with a real failure rate, extra material for the return piece, more weight and bulk to transport, and hand finishing on every visible corner. It also consumes slab: the return strip has to come from somewhere, and on a veined stone it has to come from the right place if the pattern is going to line up.
And it concentrates risk. A chipped miter tip discovered during fabrication can mean recutting from a slab you have already bought. The shops that quote miters confidently are usually the ones whose fabricators do not break them.
What this says about the shop
A mitered edge is a reasonable proxy for a shop’s ceiling. It requires a saw that holds an angle, a fabricator who can handle a fragile bevel without chipping it, someone who thinks about where the return piece comes from on a veined slab, and a finisher who can close and polish a corner. A shop that turns out clean miters has all four. That is not equipment alone — it is who is standing at the bench.
Which is the honest reason we write about this. We recruit for countertop shops, and the difference between a good miter and a bad one is almost never the machine.
Questions to ask a fabricator about miter work
- Which part of a mitered-edge job did you handle personally: layout, cutting, dry fitting, bonding or finishing?
- What material and thickness were involved, and which machine and tooling did the shop use?
- Describe a fit or finish problem you found. How did you identify the cause, and when did you ask for a second check?
- How did you communicate the edge detail and any changes to the next person in production or installation?
Candidates can use those examples in a resume or interview; employers can put the relevant responsibilities in the brief. Compare the related countertop seam guide for the installation handoff, or send a fabricator hiring brief.
Sources and limits
- Fabrication practice — 45-degree bevel, bridge saw with a tilting head or CNC, epoxy bonding, hand-finished corner — is consistent across multiple stone-tooling and fabrication sources. It is trade practice rather than a published standard, and it varies shop to shop.
- An earlier version of this article reported a 14mm figure for the tip of a 2cm miter, taken from stone-tooling guides. It has been removed: 20mm x cos(45 degrees) is 14.1mm, which is a projection of the slab thickness onto the bevel axis rather than the thickness of anything. The bevel face across 2cm material is roughly 28mm and the arris tapers close to nothing. We also removed a claim that most fabricators prefer 3cm for miters — both thicknesses are routinely mitered and we could not substantiate a preference.
- The Natural Stone Institute countertop-seam tolerances should not be assumed to govern a fabricated miter, and they address natural dimension stone rather than engineered quartz. They are cited and sourced in our article on countertop seams. The manual is a paid publication and we cite it via independent sources that agree, as explained there.
- This is about stone — quartz, granite, marble, quartzite. Mitred edges exist in solid surface and laminate too, and are made completely differently.
Published by
Countertop Jobs
Countertop Jobs recruits for the US countertop trade — fabricators, countertop installers, CNC operators, sawyers, templaters, polishers and shop managers — for fab shops across the country. We write about the work: what shops pay, what the machines and the material actually demand, and what changes on the floor.
Where this article quotes numbers, the sources and the workings are set out in how we put these figures together.
Figure look wrong, or out of date for your market? Tell us and we’ll fix it.